


How to edit a series of photos using Canvas app
Although Canvas app makes it possible for your company to build its own application, the challenge of making your application easy to use remains. After showing you the best way to allow your users to take pictures in your application, we proceed to showing you the next step; allowing your users to make changes in a set of pictures taken from a Canvas App. Why? Because it is possible to have additional information when taking a picture (such as the name of the file, a description or any other data of interest). If you allow users to modify this information or replace a photo that has already been taken by a new one, you could improve the user experience of your business application.In this article, you will discover how to edit a series of photos and additional information about these pictures using a Canvas app in PowerApps:
The photo collection
Let's say you have a customer file and you want to keep several pieces of information about it. For example, if you are in Business to Business (B2B) mode, you would probably want to keep the name and address of the company. The data you need to keep, would look like this:
- Name of the company
- Address (line 1)
- City
- Province
- Postal Code
To preserve and modify this data, the structure to use in a Canvas app is called a collection. You can see this collection as the equivalent of a table. Or, think of it as a series of rows in an Excel sheet. Here is an example of this:NameLine 1CityProvincePostal CodeACME123 MarueBeauFortQCJ8X 3H4Contoso555 duBoulevardHaute-RivièreONH2B 7P9MaCorp32A du ruisseauChamps FleurisBCM5B 8Q6
Feed the collection
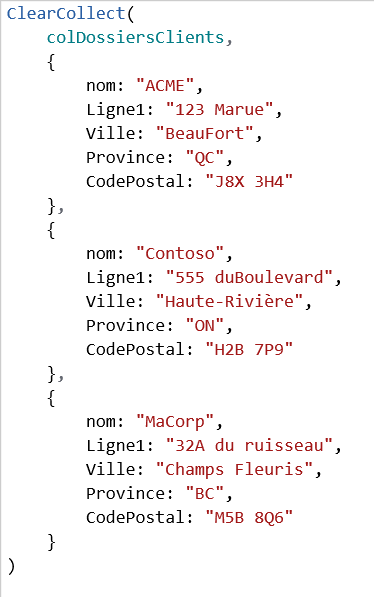
To feed this collection, you must use the Collect or Clearcollect method. This method resets the collection before adding items to it. For example:
Validate the content
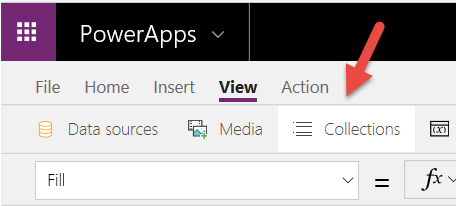
To validate the content of the collection, simply go to the Collections option of the View menu:
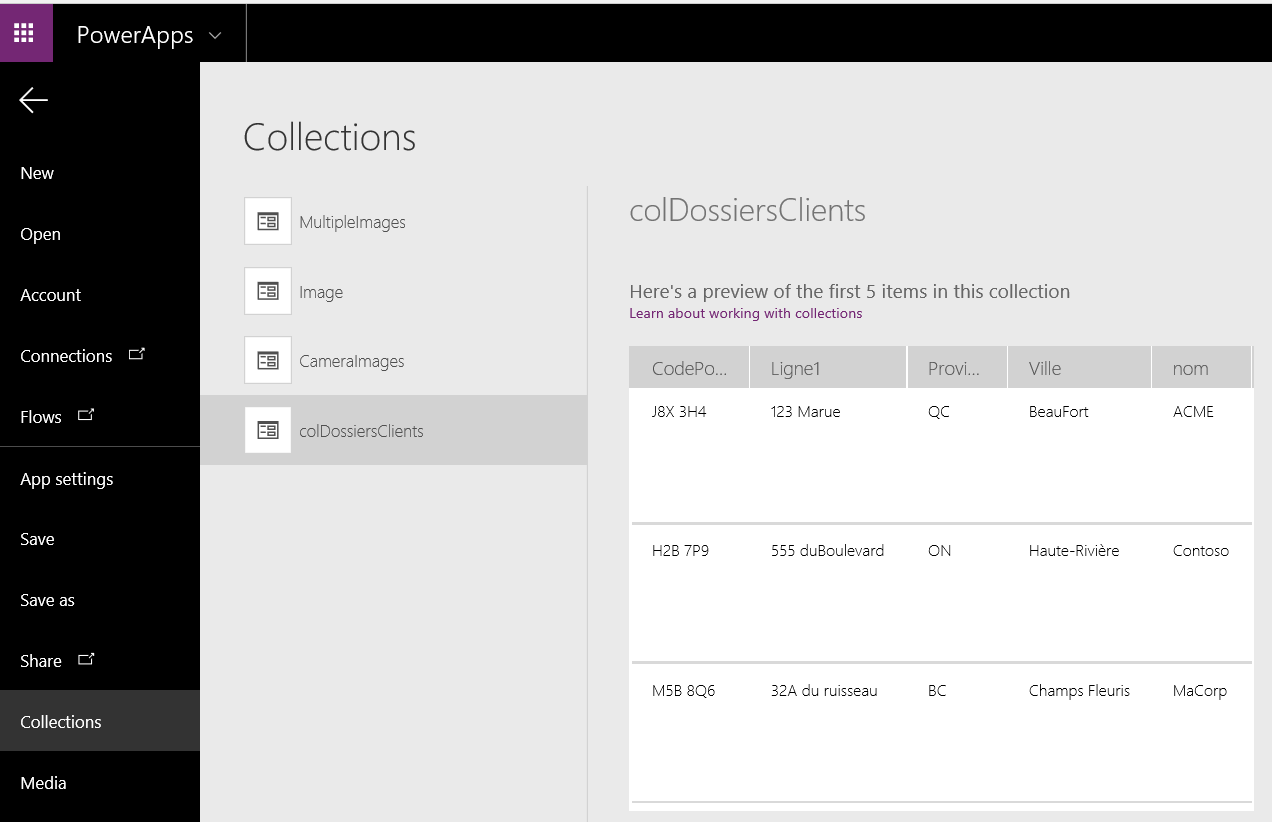
This is how you can get an overview of the data in this collection:
Editing the collections
What can you allow your users to do with the images? The different functions that can be performed on a collection are as follows:
- Collect: Allows you to add items (rows)
- Clear: Remove all items (reset)
- ClearCollect: Combines Clear and Collect in a single operation (add items to a reset collection)
- Remove: Removes specific item(s)
- RemoveIf: Removes items from the list that meet a specified criterion
Handling a set of photos
In our case cited as an example, we have 2 screens.
- The first screen ➤ contains the group of photos that were taken, which in this case will be added as an attachment to a CRM Note.
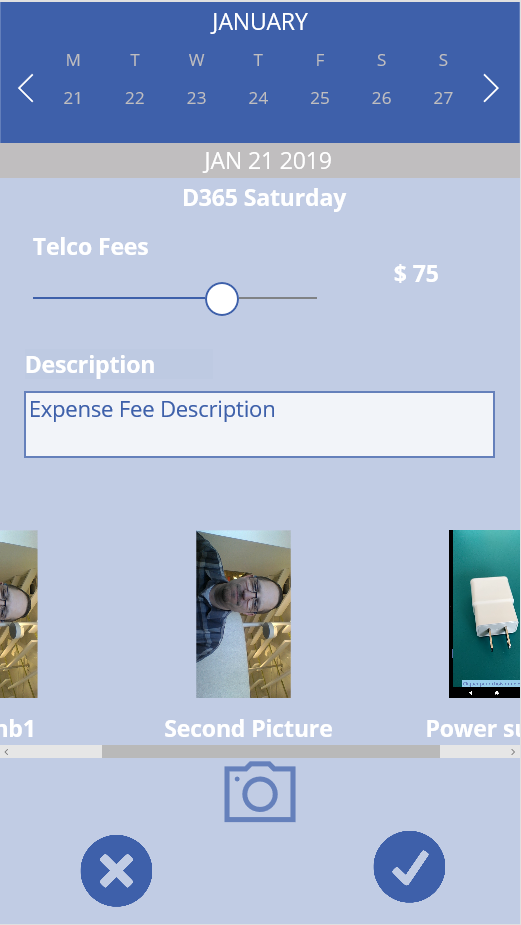
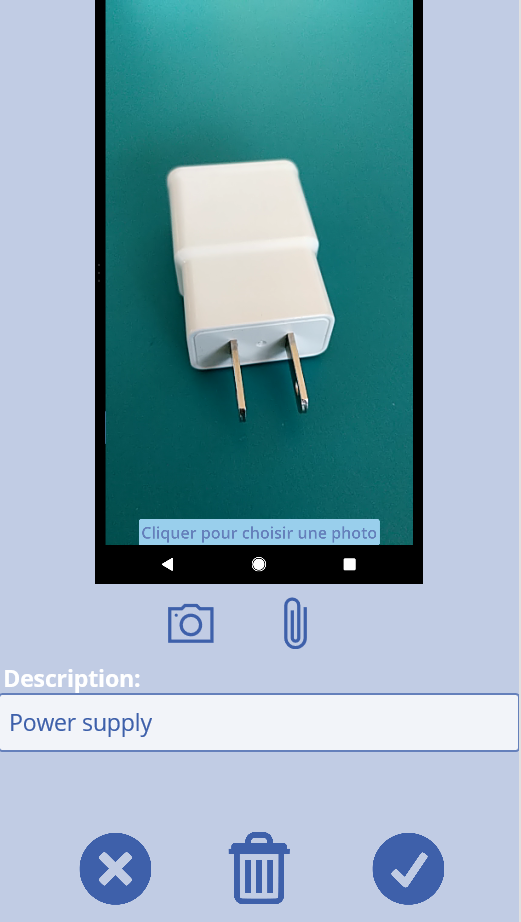
- The second screen ➤ is used to take new photos or modify a previous one and the related information (in this case a description of the photo).
The demonstration part
We will now take a closer look at the demonstration part of this article. The steps and details are as follows:

Feed the list of photos
We use a series of images (MultipleImages) to "feed" the list of photos, which is used in the Gallery1_1 Items definition.

Presentation of the collection’s items
The collection items are presented in the gallery as follows:
- Label 2:

- Image 2_5:

Add pictures to the collection
To add pictures to the collection, you must go to the second page and click on the camera icon:


Modify or remove a picture
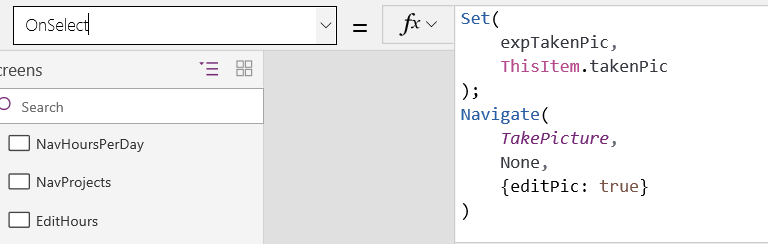
If you want to modify or remove a picture, you must go into the gallery and choose OnSelect:
How to process the collection once the user has finished
Since the photo processing has already been discussed in our previous article, the focus of this article will be to explain how to process the collection once the user has finished (The OnSelect button for example):

Remove a photo from the collection
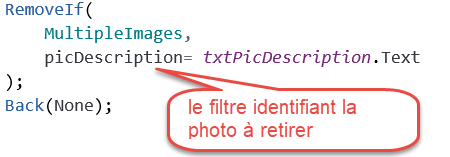
What if you want to offer your users the possibility of removing a photo from the collection? In that case, you can simply use the RemoveIf function with a feature that is unique to it. In this example, we use the description, but you could also use another unique identifier generated by your application:
There you go! You now have the tools to optimize the user experience of your application with Canvas app. Whether by allowing users to take pictures from the application or by giving them access to edit photo sets, you now have the tools to create an application that is better suited for the efficiency of our modern-day needs. Want to know more about it? Ask your questions to our experts, who will be able to offer you personalized advice! Stay tuned for the latest news, follow us on LinkedIn or Twitter! This article was made possible thanks to the expertise of our CRM architect Éric Sauvé.


.png)
.png)


